

This is kinda good:
A) stay in jammies without guilt
B) Paint
C) Paint
D) Bake lotsa cookies
E) I got groceries the day before it started..WOOT! WOOT!
Alright, so in my snowed in state, I managed to finish a desk that was given to me by a lovely stranger.I needed a new one as I sold this one and had no work space for myself...kinda. I tried to share Misters desk space, here, but well...he see's no problem with moldy coffee mugs hanging out beside the mouse pad and the piles of papers were mysertiously sticky with some caramel-type putty stuff so, I walked away from that idea. Ive been using a vintage sewing machine table that folds out. The problem with this...as lovely and retro and vintage and cool as it is, it is not meant to hold the weight of anything other than fabric on the flip out side and so more than once, Ive put my hand down to lift myself up to stand and sent the whole thing tumbling over...and a laptop (and my back) can only really handle so many coffee spills oand drops from 3 feet before she konks....and I CANT HAVE KONKING out of my laptop. Bills cant get paid, dinner wont get made, music cant get downloaded and ALL my friends and family would be unreachable..yes, konking laptops, a terrible terrible thing at Ophelia's house.
So! I know we LOVE before photo's!

I stripped the top which was so much easier than I was anticipating. I fear chemicals...I hate chemicals but I understood for stripping insanely solid 60 year old varnish off this item, it would take chemicals. I choose this product, because its biodegradable and the smell was almost pleasant..not at all able to give me that woozey, headache nausea feeling with exposure. It worked awesome! * I Recommend*

Here is my after. The pictures really do suck....I have carpal tunnel in my right arm so hauling this desk up 3 flights of stairs is, obviously not a super cool idea. Last night my sister and her boyfriend came over for dinner and WHY I didnt get one of them to help Mister do it is beyond me..but when him and I set out to do it at midnight, I knew I had a limited mobility window with which to work in. So, stopping in the best lit kitchen to snap photo's couldnt happen....or it would still be in my kitchen 3 days from now..Here we go!

The green was a Benjamin Moore "Oops" paint and its kinda greeny/gold shade that obviously doesnt get picked up in the photo...I glazed over the drawer details with copper, lime green, turquoise and gold and it has a metal finish to it that I just *heart*
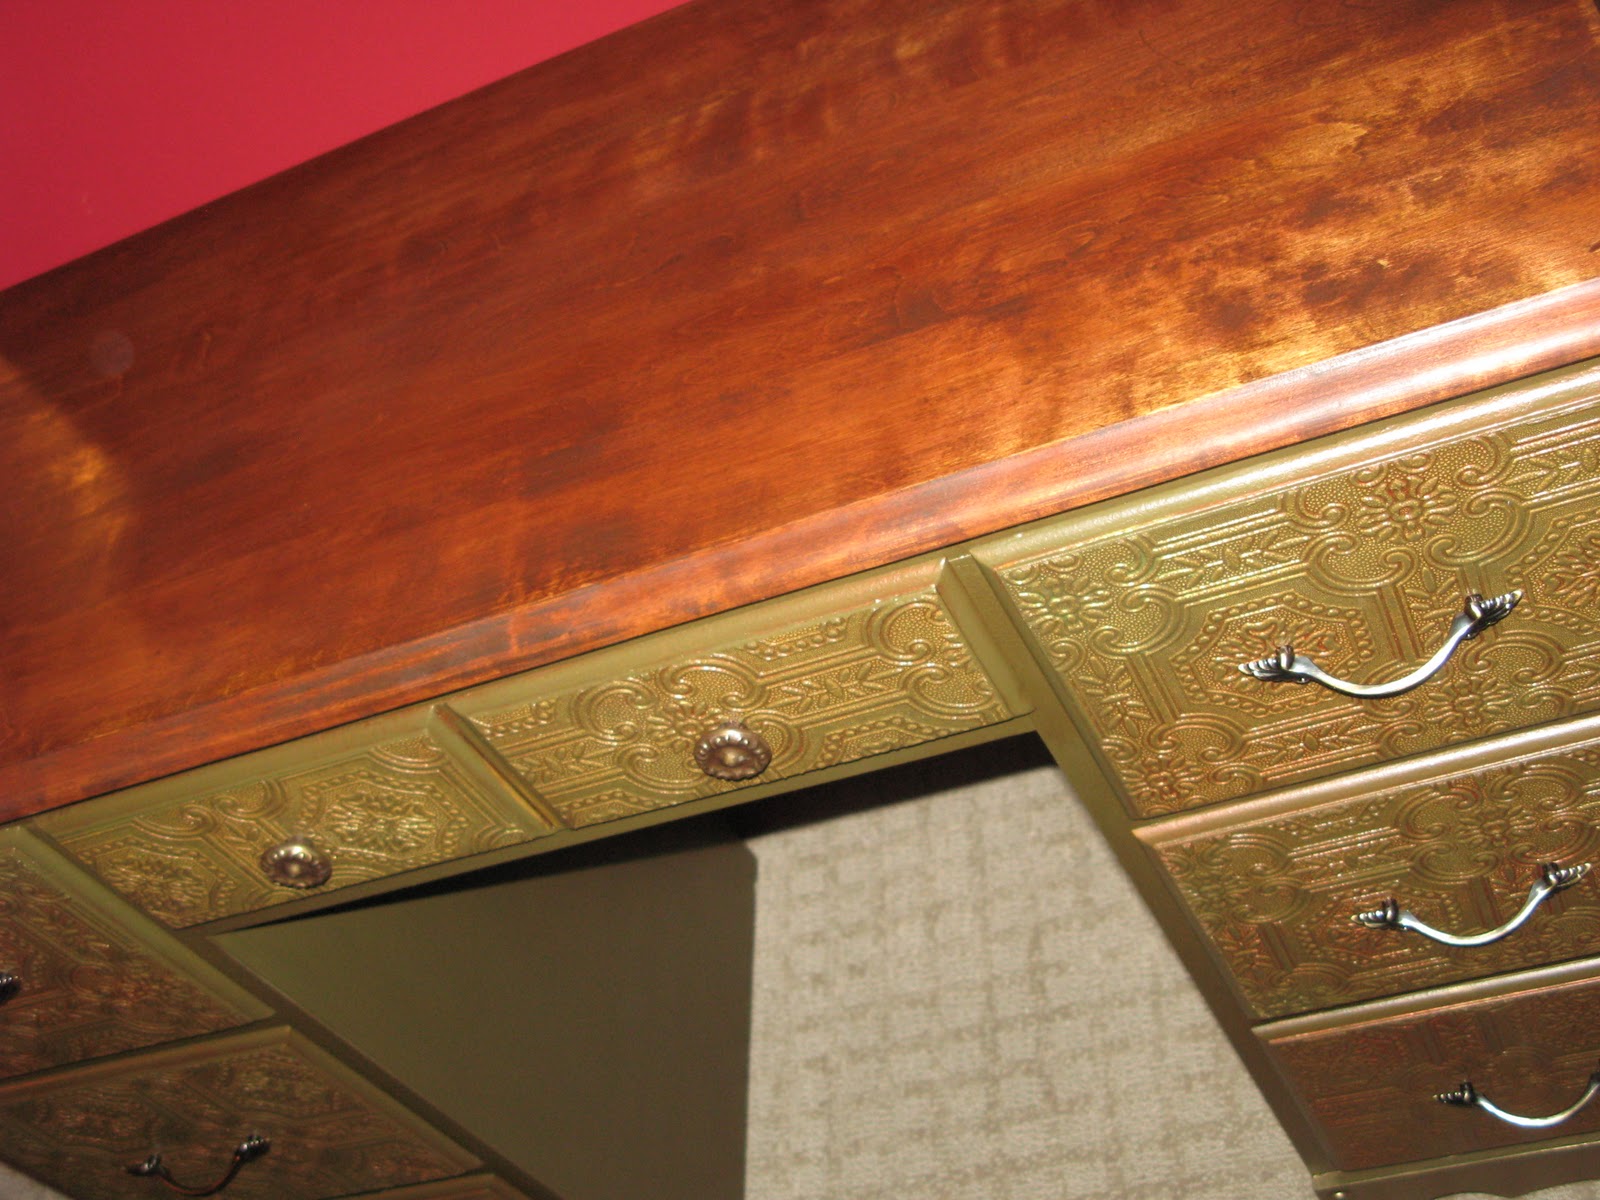
I restained the top in Minwax Provinical which is my favorite too

I also glazed the sides and the insides of the desk with metallic gold, its very suttle but ooo so pretty in a not in your face pretty way.


My Bunny hasnt seen this finished yet but I have the feeling she will be asking for it to replace the Ikea Blek desk that she has. She recently asked me for a "old new" desk for herself and Im very excited about it. I hate hate the Ikea one. She'll have to wait tho as I cant give this one up and go back to the treturious sewing table. Sadly, with this $%&#@#*@ snow, I only have one more project in my basement..and wont be going to pick up many more until the roads arnt as ridiculous, which will be like...March. I am SUPER excited about that basement one tho.....RED..that's all Im gonna say.


that turned out really cool, christie! love what you did to the drawers, and i love how you are not afraid to try new things. i also recommend citristrip which is also safe to use indoors, and smells like oranges. it does a great job at removing varnish as well. :)
ReplyDeleteHi Christie!
ReplyDeleteThanks for stopping by my blog and leaving such a nice comment. I must say, I do enjoy my view of the trees. The leaves just now finally blew off most of the trees so it'll be bare for awhile. However, I see that you're snowed in so I won't complain since it could be worse here! Love the way you re-did the drawer fronts on this desk! Never would have thought to do that--is that textured wallpaper?
Erin
What an unusual piece. I love the way you did the drawers. It looks and feels totally different from the before picture!
ReplyDeleteHi Christie...
ReplyDeleteThat is so unique. I have the same question as Erin...Is that textured wallpaper? Fabulous project for a snowy day!
Take care,
Lisa
Hi and YES, it is paintable textured wallpaper! I'm hoping for a bit more natural light tomorrow (or soon) so I can take some better photo's as these ones make it look a lot more green and less gold than it really is...in any case, thank you for time and comments! Cassie, I looked everywhere for Citristrip...and turned up nothing...Maybe its only available in the United States?? Kinda like Candy Corn Hershey Kisses??...Man, THAT recipe was such a teaser..LOL
ReplyDeleteWhat a beautiful piece! What is the wood on the top?? It looks great!
ReplyDeleteCould you share how you applied the wallpaper to the drawers? Did you do any special prep work? It looks great and I would like to copy the wallpaper idea for a dresser.
ReplyDeleteI think the desk is Maple...I stained it with Minwax Provincial and then buffed it with wax as I didnt want it "varnish shiney" but more naturally worn.
ReplyDeleteThe wallpaper was super easy Tru! I picked up the large roll from Canadian Tire..but its at Home Depot or Wal*Mart too in so many different designs. For prep, I primed the drawer fronts. Thats it. The desk had nickel thick varnish on it and I didnt want to strip them..so I lightly sanded..primed with good primer...left them overnight to dry. I also left the wallpaper to dry overnight to before I painted it, but didnt have to prime the paper before I painted.. I measured the papaer to the size I wanted..cut, dipped in water for 30 seconds..then folded the paper paste side to paste side for another couple minutes (it said to leave it for 5 minutes, but I dont have patience to to that 8 times) then I placed it on my drawers. After it dried, I did sand the egdes lightly into the drawer edges to make it softer of an edge and blend better. Thats it!! If you have any questions when your doing yours! Feel free to ask me!
This comment has been removed by the author.
ReplyDeleteAlso, I dont know if Im a crappy meassure-er OR the paper shrunk a tiny tiny bit after it was wet..but when your measuring it out...give it a tiny bit more..like 1/4" all around. You can cut it with a Utility knife afterwards..In my case, you cant notice at all the crooked cutting because I painted my drawer egdges the same color and when I placed my paper, I made sure the design was straight more so than the paper corner to corner with the drawer..but just incase, keep that in mind if you need yours to be more exact of a fit depending on your design.
ReplyDeletegreat job! The desk is gorgeous. I love the wallpaper and the glazing.
ReplyDeletethanks for linking up!
gail
I used this wallpaper for my back splash and have a ton left over. Thanks for some ideas on what to do with it! Great job on the desk!
ReplyDelete